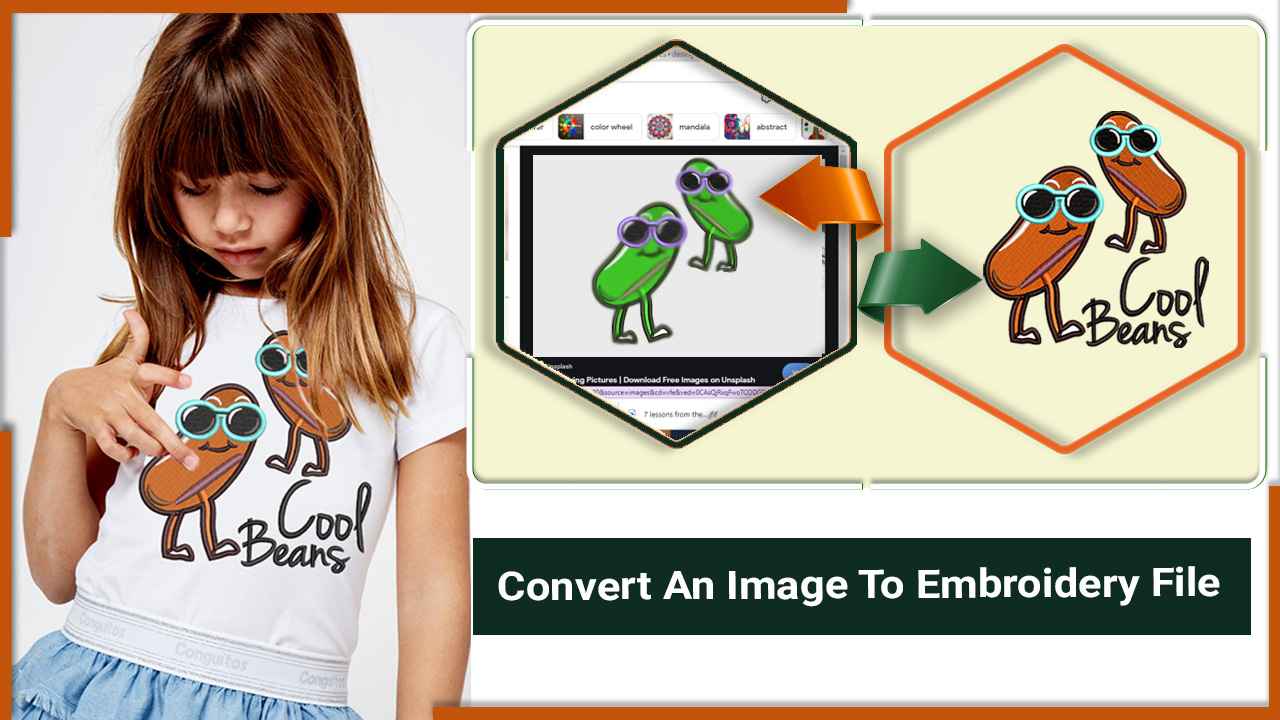
Embroidery, once a skill handed down through generations with needles and threads, has now seamlessly transitioned into the digital realm. If you’ve ever wondered about transforming your favorite images into embroidered masterpieces, you’re in the right place. In this comprehensive guide, we’ll explore the intricacies of converting an image to an embroidery file. Whether you’re a novice or seasoned crafter, by the end of this journey, you’ll be equipped with the knowledge to turn your visual ideas into stitched realities.
The Journey Begins: Understanding the Basics
Before we embark on the journey of converting images into embroidery files, let’s lay the groundwork by understanding some essential concepts:
1. Embroidery File Formats:
- Embroidery machines communicate through specific
- embroidery file format such as DST, PES, JEF, and more. Knowing your machine’s preferred format is key for successful conversion.
2. Digitization:
- Converting an image involves the process of digitization. This transformative step interprets visual elements into the language of stitches, colors, and patterns that embroidery machines understand.
3. Free and Paid Tools:
- Various tools are available for image-to-embroidery conversion. Some are free, like [Tool1] and [Tool2], while others come with premium features. In this guide, we’ll focus on the free options.
Step-by-Step Guide: Converting Image to Embroidery File
Step 1: Selecting the Right Image
-
Choose a High-Quality Image:
- Opt for an image with clear details and defined colors. Higher resolution images produce better embroidery results.
-
Consider Image Complexity:
- Simple images with distinct shapes and colors are often more suitable for embroidery.
Step 2: Downloading the Image-to-Embroidery Tool
-
Research and Choose a Tool:
- Explore free tools available for image-to-embroidery conversion. [Tool1] and [Tool2] are reputable choices.
-
Download and Install:
- Follow the instructions on the tool’s website to download and install the software on your computer.
Step 3: Importing Your Image
-
Launch the Software:
- Open the installed tool on your computer.
-
Import Your Image:
- Locate and import your chosen image into the tool. Most tools support common image formats like JPEG, PNG, and BMP.
Step 4: Adjusting Parameters
-
Setting Stitch Density:
- Adjust stitch density settings based on the intricacy of your design. Higher density for detailed designs, and lower density for simpler ones.
-
Choosing Thread Colors:
- Select thread colors that closely match the colors in your image. Some tools provide a color palette for easy selection.
Step 5: Defining Stitch Types
-
Automatic Stitch Detection:
- Some tools automatically detect and assign stitch types. Review and adjust as needed.
-
Manual Stitch Placement:
- For more control, manually place stitches to ensure they align with the details of your image.
Step 6: Previewing and Editing
-
Preview Your Design:
- Utilize the preview feature to see how your design will appear once embroidered.
-
Edit as Necessary:
- Make any needed adjustments to enhance the final result. Some tools allow you to tweak individual stitches or colors.
Step 7: Exporting as an Embroidery File
-
Choosing the Output Format:
- Select the embroidery file format compatible with your machine (DST, PES, JEF, etc.).
-
Saving Your File:
- Save the converted embroidery file to your computer. Pay attention to file naming and location for easy retrieval.
Step 8: Transferring to Your Embroidery Machine
-
Connecting Your Machine:
- Use a USB cable or your machine’s preferred method to connect it to your computer.
-
Transferring the File:
- Copy the saved embroidery file to the designated folder on your embroidery machine.
Step 9: Embroidering Your Design
-
Preparing Your Fabric:
- Secure your fabric in the embroidery hoop, ensuring it’s taut and ready for stitching.
-
Selecting the Design on Your Machine:
- Navigate to the design folder on your embroidery machine and select the converted file.
-
Starting the Embroidery Process:
- Follow your machine’s instructions to begin the embroidery process. Enjoy watching your design come to life!
Tips for a Successful Conversion
-
Start Simple:
- If you’re new to image-to-embroidery conversion, begin with simpler designs to understand the process.
-
Experiment with Settings:
- Don’t be afraid to experiment with stitch density, colors, and other settings to achieve the desired outcome.
-
Use Quality Images:
- High-resolution images with clear details result in better embroidery designs.
-
Test on Scrap Fabric:
- Before embroidering on your final piece, test the design on a scrap of the intended fabric to ensure satisfaction.
Conclusion
Converting an image to an embroidery file or dst file is a journey that merges art with technology. With the right tools and a touch of creativity, you can turn virtually any image into a stitched masterpiece. Whether you’re customizing clothing, adding personal touches to home decor, or creating unique gifts, the possibilities are limitless.
Embark on this digital-to-embroidery adventure, and witness the magic of transforming your visual ideas into tangible, stitched realities. Happy crafting!
FAQs (Frequently Asked Questions)
-
Can I use any image for embroidery conversion?
- While many images can be converted, high-quality images with clear details and defined colors work best.
-
Are there other free tools for image-to-embroidery conversion?
- Yes, besides [Tool1] and [Tool2], various online tools offer free image-to-embroidery conversion.
-
Can I edit the converted embroidery file further?
- Some tools allow additional editing after conversion, but it’s advisable to make necessary adjustments before exporting the file.
-
Is there a limit to the size of the image I can convert?
- The image size may be limited by the capabilities of the software you’re using. Check the tool’s specifications for size restrictions.
-
Do I need special thread for machine embroidery?
- Yes, using thread specifically designed for machine embroidery is recommended for optimal results.